
Use Maestro Deck’s free local desktop runner to develop Maestro testing flows that wait for observable screen state instead of sleeping for a fixed duration. Assert the destination state, use a bounded wait for longer asynchronous work, and inspect the selector when a flow fails; optional cloud execution comes after the flow works locally.
- Maestro testing should wait for a meaningful screen state, not an arbitrary delay.
- Maestro Deck is best for developers writing and inspecting Maestro YAML flows locally.
- Use extendedWaitUntil for a longer state transition; use waitForAnimationToEnd for visual motion.
- A timeout bounds waiting. It does not prove the app reached the correct state.
Why this matters
A fixed wait tests your timing assumption. A state-based wait tests whether the app reached the condition your next action needs. That distinction matters when a request, animation, or background refresh finishes at different times across runs.
Maestro Deck provides a free, source-available local runner and inspector for Maestro YAML flows. Local use does not require paid cloud execution. Maestro Deck is a tool for working with the Maestro framework; the two names do not describe the same product.
For your 2026 release workflow, separate test authoring from execution scale. First make the flow express the right conditions locally. Then decide whether CI or additional execution environments justify optional cloud runs.
How do you handle asynchronous screens in Maestro testing?
Wait for the state that makes the next action valid. For example, after submitting a form, wait for a result that identifies successful completion—not merely for the submit button to disappear.
Maestro provides synchronization behavior around UI interactions and assertions. Use ordinary commands first, then introduce an explicit bounded wait where an asynchronous transition needs a longer allowance. Choose the command by the condition you need to establish.
| Approach | Best for | Advantage | Limitation |
|---|---|---|---|
| Normal interaction and assertion commands | Ordinary screen transitions | Keeps the flow focused on user behavior | Does not replace a deliberate completion check |
assertVisible | Confirming an expected UI state | Makes the expected result explicit | A generic matching label can identify the wrong state |
extendedWaitUntil | Longer asynchronous state changes | Waits for a visible or absent condition within a timeout | A weak condition still produces a weak test |
waitForAnimationToEnd | Waiting for visual motion to settle | Addresses animation rather than guessing its duration | Does not establish business completion |
| Fixed-duration delay | Deliberately observing elapsed time | Expresses a timing requirement directly | Does not prove readiness and waits even when readiness arrives earlier |
These approaches are not interchangeable. A visually settled screen can still contain stale data. A visible heading can belong to the previous screen. Select the condition before selecting the command.
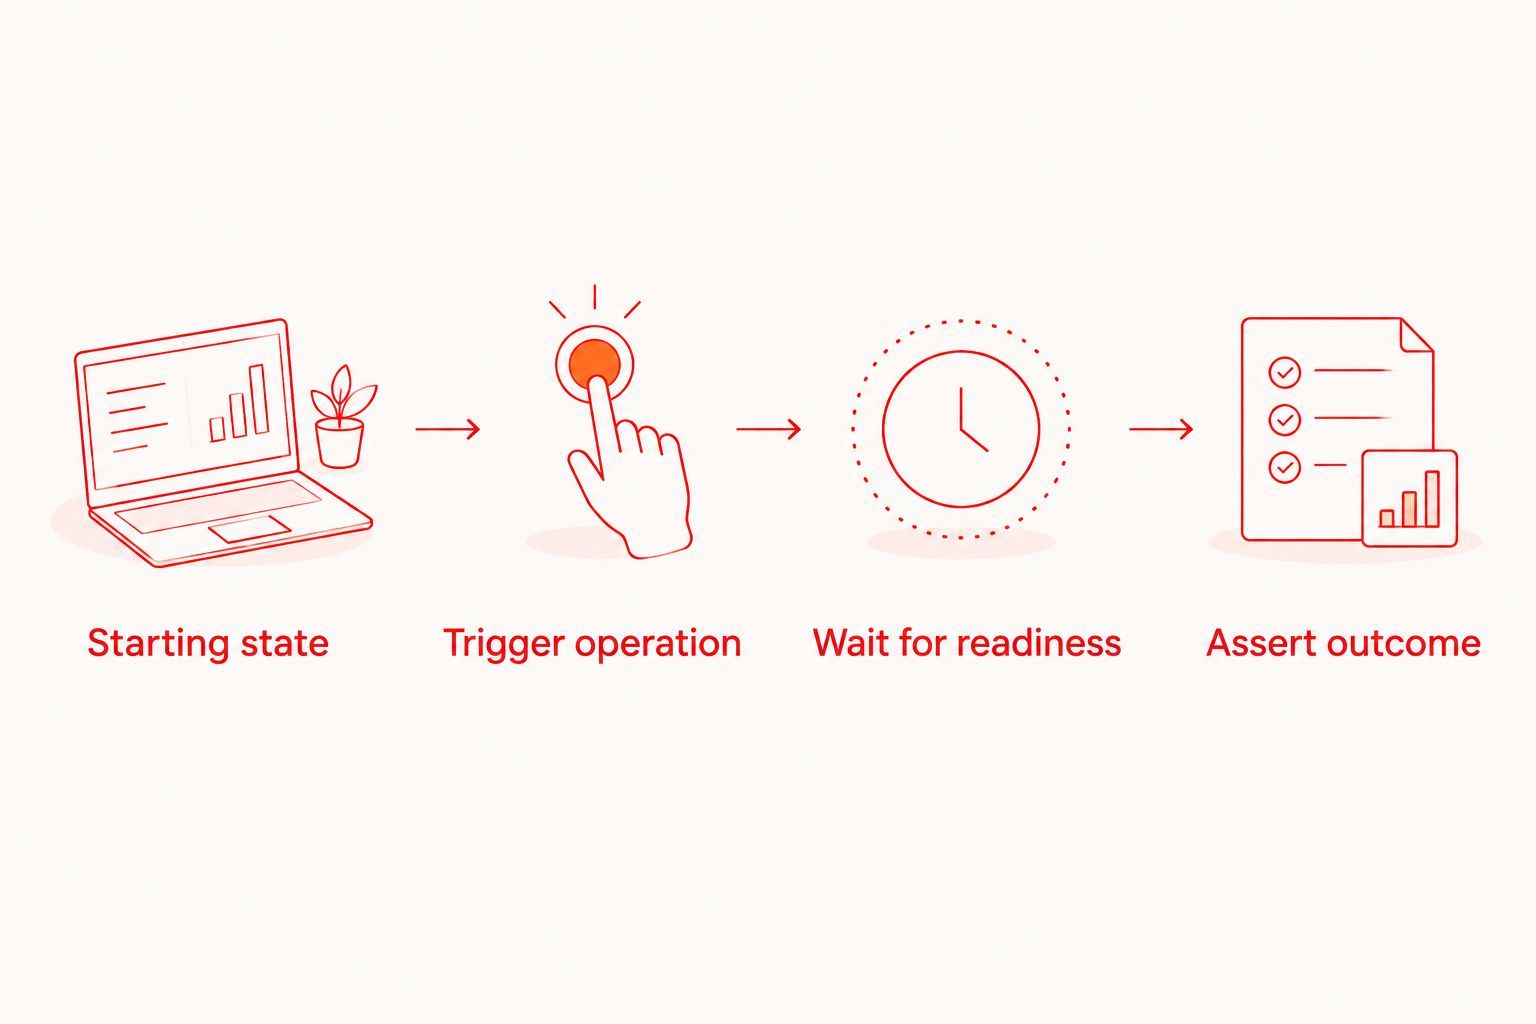
Establish the starting state
Begin with a known account, record, or screen. Define what the app must already contain before the action runs. Otherwise, an existing success message or previously loaded record can satisfy an assertion before the new operation finishes.
Keep setup separate from the behavior under test. If setup fails, stop there rather than letting the next interaction produce a misleading failure.
Trigger the operation
Perform the user action that starts the asynchronous work. Keep the action and its completion check adjacent in the YAML flow so the dependency is easy to review.
Avoid unrelated taps between submission and verification. Every extra interaction makes it harder to identify which operation produced the observed result.
Wait for readiness
Choose an observable state that means the next step is safe. That might be the expected record appearing, a destination-specific control becoming visible, or a blocking overlay disappearing.
Prefer a positive result when it directly represents success. An absent spinner only proves that the spinner is absent; it does not distinguish successful completion from an error screen.
Assert the outcome
After readiness, verify the operation’s result. If you submitted a change, check the resulting value or the expected destination—not just that the interface accepts input again.
Keep readiness and correctness separate when they represent different conditions. This makes failures easier to interpret: the screen either never became usable, or it became usable with the wrong result.
Use ordinary assertions for ordinary transitions
Start with the shortest flow that expresses the behavior. Tap the control, then assert the destination-specific element. Do not add a long explicit wait to every transition as a precaution.
The useful question is not whether a screen loaded quickly. It is whether the expected condition appeared within the command’s allowed execution window. A fixed delay cannot answer that question on its own.
Choose selectors that describe the intended element precisely. A generic text match such as a common navigation label is weaker than a condition that distinguishes the destination or result.
If a normal assertion fails, inspect the screen before changing timing. The flow might be on an error page, the expected element might have changed, or the selector might match something unintended. Use the guide to debugging a failing flow with Inspector Mode to examine what the flow actually sees.
Recommendation: keep ordinary transitions ordinary. Add specialized waiting only when the observed failure identifies a different synchronization need.
Use extendedWaitUntil for longer asynchronous work
Use extendedWaitUntil when a visible or absent UI condition needs an explicit, longer waiting boundary. Typical test situations include waiting for a submitted operation’s result or for a blocking state to clear.
The condition still needs to represent the operation you triggered. Waiting longer for a generic heading does not make that heading evidence of successful completion.
Treat the timeout as a failure boundary, not a mandatory pause. A state-based wait can finish when its condition is met; a fixed delay consumes its chosen duration regardless of readiness.
Keep units explicit during review. 1 second equals 1,000 milliseconds; 10 seconds equals 10,000 milliseconds. A unit mistake changes the waiting boundary without changing the condition, which can obscure the real cause of a failure.
Do not choose timeout values from an imagined universal benchmark. Use the app’s expected behavior and the execution environment you actually observe. In a 2026 test review, require an explanation for unusually long waits rather than accepting them as harmless defaults.
Use waitForAnimationToEnd for visual motion
Use waitForAnimationToEnd when the obstacle is ongoing visual animation. It addresses a different condition from waiting for a request’s result.
Consider a transition that moves a panel into place. Waiting for animation addresses the motion. Checking the expected content addresses the data. Neither check automatically substitutes for the other.
This distinction matters on screens with loading indicators. A screen can stop moving while it still shows incomplete information. Conversely, decorative animation can continue after the meaningful result is ready.
Recommendation: identify whether you are waiting for pixels or for meaning. Use an animation wait for motion, and an outcome assertion for the operation’s result.
Why asynchronous waits vary
The right waiting condition depends on what changes and what the next action requires. Review these factors before adjusting a timeout:
- Operation completion: A background task can outlast the navigation that started it. Check its result rather than the navigation alone.
- UI rendering: The app must expose the expected state through an element your flow can identify.
- Animation: Visual motion can affect the moment when an interaction is appropriate without establishing data correctness.
- Selector specificity: A broad match can succeed against an unrelated element or fail to distinguish old content from new content.
- Starting data: Cached or previously created content can satisfy a condition that was supposed to prove a new operation finished.
- Execution environment: Local runs and CI runs need separate observation. Do not assume identical timing simply because they execute the same flow.
Increasing a timeout addresses only the waiting boundary. It does not repair an incorrect starting state, a weak selector, or a failed operation.
How do you distinguish a timing failure from an app failure?
A timing failure means the expected state arrived outside the flow’s allowed waiting behavior. An app failure means the operation did not produce the expected result. Inspect the actual end state before assigning either diagnosis.
Record which action triggered the work and which condition failed. Then inspect whether the app shows a result, an error, an intermediate state, or an unrelated screen.
For a 2026 release smoke suite, make failure messages interpretable through the flow’s structure. A tightly scoped action followed by a specific check gives you a clearer investigation point than a long sequence ending in a generic assertion.
Should you retry the action when a wait fails?
Do not automatically retry a state-changing action just because its confirmation was late. The operation might already have completed even though the expected UI condition did not appear.
For actions that create or modify data, inspect the resulting state first. Repeating submission can change the scenario you are trying to diagnose.
Is a longer timeout enough to fix flaky tests?
A longer timeout fixes only cases where the correct condition needs more time. It does not fix a condition that matches stale content or waits for an element that never represents success.
Change the condition when the evidence is wrong. Change the boundary when the evidence is right but legitimately arrives later.
Move to CI after the local flow is meaningful
Maestro Deck is best for developers writing and inspecting Maestro YAML flows locally. Its free local workflow lets you develop the test without treating cloud execution as a prerequisite.
The trade-off is that local execution alone does not answer every CI or execution-scale requirement. Optional paid cloud execution addresses a separate workflow decision; it is not a remedy for an ambiguous assertion.
Before moving a flow into your 2026 CI workflow, review its dependencies:
- Identify the required starting data and account state.
- Confirm each asynchronous operation has an explicit completion check.
- Remove delays that exist only to conceal an unexplained failure.
- Check that selectors distinguish the expected result from existing content.
- Keep environment assumptions visible in the test setup.
Simulator and emulator support does not establish physical-device coverage. Choose the execution environment based on what your test needs to prove, not on a generic claim of device testing.
Start with a local flow
Write, run, and inspect Maestro YAML flows locally before considering optional cloud execution.
FAQ
How do I avoid fixed waits in Maestro testing?
Wait for an observable UI condition that makes the next action valid. Start with ordinary assertions and use extendedWaitUntil when a longer asynchronous transition needs an explicit timeout.
What's the difference between assertVisible and extendedWaitUntil?
assertVisible checks that the expected element is visible; extendedWaitUntil expresses a visible or absent condition with an explicit waiting boundary. Choose the condition first, then decide whether the longer wait is necessary.
Does waitForAnimationToEnd wait for a network request?
waitForAnimationToEnd checks visual animation, not successful network completion. Assert the request's expected UI result separately.
Should I wait for a loading spinner to disappear?
Wait for a spinner to disappear when its presence blocks the next interaction, but do not treat disappearance alone as proof of success. Verify the expected content or destination afterward.
Why does my test pass locally but fail in CI?
Inspect the failed state before blaming timing. Compare starting data, selectors, setup, and execution conditions, then adjust the wait only when the evidence identifies a timing boundary problem.
Do I need paid cloud execution to use Maestro Deck locally?
Maestro Deck provides a free local desktop runner and inspector. Paid cloud execution is optional when your workflow needs CI execution or additional scale.
Is Maestro Deck the same thing as the Maestro framework?
Maestro Deck is a desktop runner and inspector for working with Maestro YAML flows. Distinguish the tool from the framework, and do not infer affiliation from their names.
Is source-available the same as open source?
Source-available and open source are not interchangeable licensing terms. Maestro Deck is described as source-available; evaluate its license terms against your requirements.
One last thing
A wait can succeed too early. If the expected text was already visible before submission, the flow can pass without proving that the new operation completed.
For your next 2026 flow review, check the starting state before increasing any timeout. The strongest wait identifies a new, meaningful result—not merely a familiar screen.