
Instead of manually repeating checkout before every release, use mobile app automation testing to run a repeatable Maestro YAML flow against a controlled test environment. Start with Maestro Deck, the free local desktop runner and inspector, then add optional cloud execution when your release workflow needs CI runs.
- Start mobile app automation testing with Maestro Deck's free local runner; add cloud execution when CI becomes necessary.
- Verify checkout outcomes, not just taps: cart contents, payment status, and the resulting order must agree.
- Use sandbox payments and repeatable test data; never submit automated checkout flows against live payment processing.
- Keep local debugging separate from release gating: a passing flow must test the build you intend to ship.
Why this matters
A checkout flow can reach a confirmation screen without proving that the order is correct. The cart, selected delivery method, payment result, and order record need separate checks. A tap sequence alone proves only that the automation reached its final step.
Maestro Deck is best for developers and QA engineers who want free local execution and inspection of Maestro YAML end-to-end tests. Maestro is the testing framework; Maestro Deck provides a desktop runner and inspector for its flows. Treat them as distinct projects, not interchangeable names or evidence of affiliation.
For your 2026 release checklist, define a successful checkout in observable terms before writing automation. Keep the initial flow narrow: one customer, one cart, one delivery path, and one sandbox payment outcome.
Before you start
- Prepare the runner and app. Install the desktop runner, prepare a testable application build, and make the intended iOS or Android test target accessible. Local use does not require a cloud account.
- Prepare controlled checkout data. Use a dedicated test customer, a known catalog fixture, and your payment provider's documented sandbox credentials. You also need permission to inspect test orders and restore the account's starting state.
- Resolve the payment boundary first. Payment handoffs can leave your application or display provider-controlled interfaces. Confirm which parts your chosen environment supports before building the flow; simulator or emulator support does not establish physical-device coverage.
Never use a real customer account or live payment credentials for this workflow. Keep secrets outside committed flow files, and keep test execution separate from production order fulfillment.
Checkout acceptance criteria
Define the checkout contract
- Write down the starting state: signed-in customer, empty cart, known address, and no unfinished checkout session.
- Choose a catalog fixture with predictable checkout behavior. Record its identifier and the expected cart contents in your test specification.
- Define the final evidence: the expected item, delivery choice, payment outcome, and an order identifier or equivalent order record.
- Decide where each assertion belongs. Check visible customer-facing details in the UI; use an authorized backend check when an order or payment fact is not exposed there.
Expected result: Your checkout specification distinguishes a successful screen transition from a successful order. Another developer can read the assertions and explain what a pass actually proves.
Use this acceptance map before opening the flow editor:
| Checkpoint | Evidence to require | What it does not prove |
|---|---|---|
| Cart | Expected item and quantity | Payment can complete |
| Delivery | Selected delivery method and address | The order stores those selections |
| Review | Expected items and displayed total | A payment has been accepted |
| Confirmation | Successful outcome and order identifier | Fulfillment or settlement has completed |
| Order record | Expected customer, items, and payment state | Every downstream system has finished processing |
Do not hard-code a displayed total without controlling its inputs. Taxes, delivery rules, and promotional state can change the result. Either establish those inputs as fixtures or assert the relationship your application guarantees.
For a 2026 checkout smoke test, prefer a small deterministic contract over a long tour through every purchase option. Add separate flows for materially different behavior rather than conditional branches that hide which path ran.
Test environment and state
Establish a repeatable starting point
- Install or select the application build associated with the release candidate. Record its build identity alongside the test result.
- Select the intended test backend and confirm the payment integration is in sandbox mode before submitting anything.
- Restore the test customer, cart, and order prerequisites through your approved test-data process.
- Launch the application and verify the actual starting screen. Do not assume that reinstalling or restarting the app clears server-side state.
Expected result: Repeating setup produces the same account and cart conditions without depending on the previous run.
App state and backend state are different. Clearing local storage does not necessarily remove an existing cart, invalidate a remote checkout session, or delete an order. Define ownership for both sides of the reset.
For implementation details, use the guide to resetting app state between test runs. Apply cleanup to the test fixtures you own; never use broad deletion against shared environments.
Name your workflow phases explicitly: Prepare state, Run checkout, Verify order, and Restore fixtures. These boundaries make failures easier to assign and prevent cleanup errors from masquerading as checkout defects.
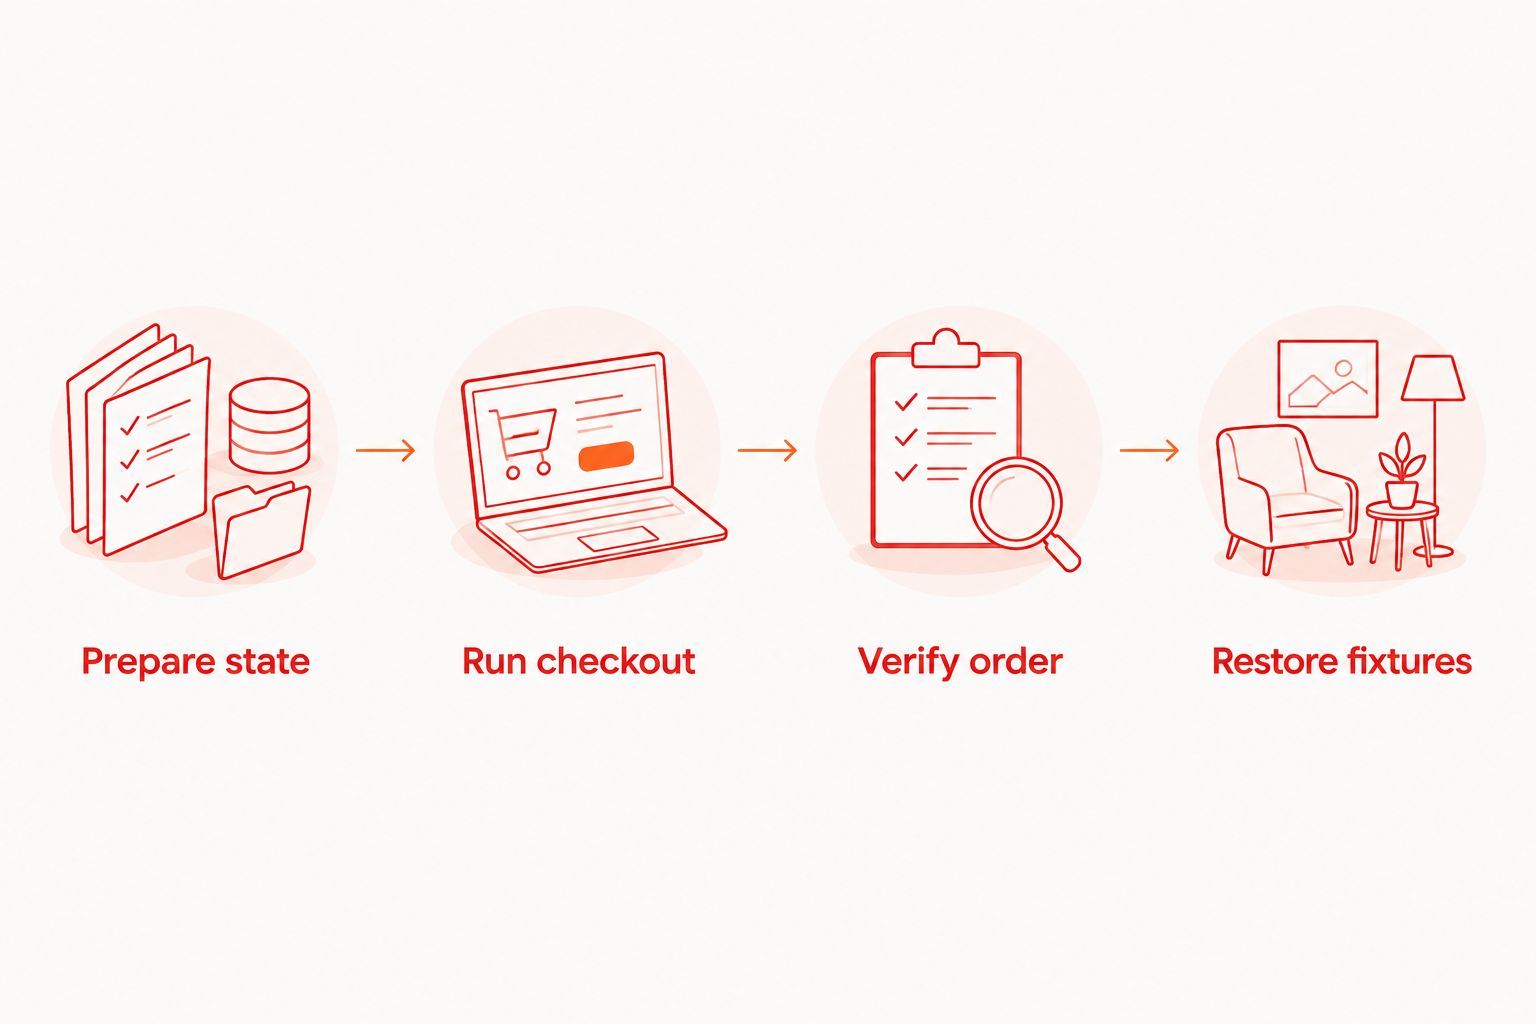
Retain the order identifier before cleanup removes the fixture. Otherwise, a failed run can lose the evidence needed to distinguish a UI problem from a backend problem.
YAML flow and assertions
Build the customer journey locally
- Open the checkout flow in the desktop runner. Use Inspector Mode to examine the elements exposed by the application at each checkout screen.
- Choose selectors tied to stable element identity. Prefer dedicated identifiers where your app exposes them; avoid relying on screen coordinates for ordinary controls.
- Express the journey in Maestro YAML: establish the starting screen, add the fixture item, inspect the cart, select delivery, and submit sandbox payment.
- Insert assertions at meaningful boundaries. Verify cart contents before proceeding, the selected delivery state before submission, and the successful result afterward.
- Run the flow locally, inspect the failing boundary, and correct either the application or the test before adding more scenarios.
Expected result: The YAML flow reaches a verified checkout outcome from a controlled starting state, and a failure identifies the unmet expectation.
Use the actual identifiers and accessible text from your application. A label such as Place order is valid only if that is what your app exposes; do not copy example labels into selectors without inspecting them.
For asynchronous transitions, wait for observable application state rather than adding arbitrary pauses. A loading screen disappearing is weaker evidence than the expected checkout screen appearing. Choose the condition that establishes readiness for the next action.
Keep the YAML readable. Separate reusable preparation from checkout-specific assertions, but do not extract every tap into another file. The main flow should still show the business behavior under test.
During your 2026 release work, review changed selectors alongside changed checkout behavior. A renamed element can break automation without breaking the purchase path; a weakened assertion can leave automation passing while the purchase path is wrong.
Release execution and evidence
Connect the verified flow to release checks
- Save the flow with the application changes it validates so reviewers can inspect behavior and assertions together.
- Select the release candidate build explicitly. Avoid testing one artifact locally and shipping another without rerunning the relevant checks.
- Choose local execution or optional paid cloud execution according to where the release check must run.
- Configure the release workflow to treat a failed required checkout test as a failed check. Preserve the build identity, failed assertion, environment, and available diagnostic output.
- Require investigation before accepting a rerun. A pass after repeated retries does not explain the original failure.
Expected result: The release check reports whether the intended artifact met the checkout contract, with enough evidence to investigate a failure.
Choose the execution path
| Execution path | Best for | Advantage | Trade-off |
|---|---|---|---|
| Maestro Deck local runner | Developers writing and debugging checkout flows | Free desktop execution and inspection | A developer-run check is not an unattended CI release gate |
| Optional cloud execution | Teams that need tests initiated from CI | Moves execution into the release workflow | Adds service configuration and test-data handling decisions |
Start locally. Moving an unreliable flow to cloud execution changes where it fails, not whether its assertions are sound. Confirm target support and data-handling requirements before choosing the execution environment.
Start with local checkout testing
Write and inspect Maestro YAML flows locally. Add optional cloud execution when your CI workflow needs it.
Variant: rerun checkout when payment behavior changes
Best for: Changes to payment integration, checkout validation, or order creation that need more than a successful purchase test.
Keep the successful checkout flow as the baseline. Add a separate sandbox-decline flow using the payment provider's documented test mechanism, with its own starting state and expected result. Do not force a decline by entering invented payment details.
The declined-payment flow should verify:
- The customer sees an actionable failure state rather than a success confirmation.
- The application preserves or clears the cart according to its defined behavior.
- The resulting order and payment state match the application's documented contract.
- A subsequent valid attempt follows the expected recovery path.
Do not assume every declined payment creates no order record. Some systems retain an unpaid or failed order. Assert the intended state, not a universal checkout rule that your application does not follow.
For 2026 payment changes, review the success and decline flows together. They should share fixture preparation where appropriate but retain distinct outcome assertions and diagnostic evidence.
Troubleshooting
The flow passes only after a manual checkout
The automation depends on state that manual testing created. Inspect saved addresses, authentication, consent screens, and remote cart contents. Move the required preparation into the test setup, then rerun without manual intervention.
The payment step leaves the app and stops
The payment provider has introduced a handoff outside the scope your current flow controls. Identify the external screen and confirm support in the chosen environment. Use a documented sandbox path or test that boundary separately; do not silently skip it and report full checkout coverage.
The confirmation screen appears, but the order is wrong
The final assertion is too weak. Check the order identifier and expected contents, then inspect the authorized test order record when needed. Keep UI confirmation and backend order verification as separate evidence.
The test fails when checkout takes longer
The next action starts before the required screen or element is ready. Replace fixed delays with a supported state-based wait or assertion. Investigate application errors separately from slow transitions; waiting longer does not repair a failed request.
Parallel runs modify the same cart
The runs share a customer or mutable fixture. Give concurrent executions isolated test identities or serialize the affected scenario. Cleanup must target the fixtures belonging to that execution, not another run's active checkout.
Customize your workflow
Expand coverage by risk, not by duplicating the happy path. Add a separate flow when the expected outcome changes: session expiry, delivery validation, payment recovery, or duplicate submission handling. Give each flow a clear starting state and a specific failure signal.
Keep the checkout smoke flow small enough to diagnose. Use broader regression coverage for combinations that do not belong in every release gate. For your 2026 test plan, assign an owner to fixture maintenance and an owner to failed-check triage; otherwise, broken automation becomes an ignored notification.
Maestro Deck is source-available, not described here as open source. Those licensing terms are not interchangeable. Review the applicable license before redistribution or modification, and evaluate cloud execution separately from free local use.
FAQ
What's the best way to start mobile app automation testing for checkout?
Start with a controlled sandbox checkout and a narrow set of outcome assertions. Use Maestro Deck's free local runner to write and inspect the Maestro YAML flow before adding optional cloud execution.
Do I need a cloud account to run checkout tests locally?
No. Local desktop use does not require a cloud account; cloud execution is a separate option when your workflow needs it.
Is Maestro Deck the same thing as the Maestro framework?
No. Maestro is the testing framework, while Maestro Deck provides a desktop runner and inspector for writing and executing Maestro YAML flows. The names do not establish an affiliation.
Should automated checkout tests use real payment cards?
Use the payment provider's documented sandbox credentials instead of live payment credentials. Keep the application, backend, and payment environment configured for testing before submission.
Does a confirmation screen prove the checkout worked?
A confirmation screen alone does not prove that the order contents and payment state are correct. Assert the visible outcome and inspect the authorized test order record when the required facts are not exposed in the UI.
Can I use the same customer for parallel checkout tests?
Use isolated customers or serialize tests that modify shared customer state. Concurrent runs against the same cart can overwrite each other's setup and invalidate the result.
Does simulator support mean physical devices are covered?
No. Simulator or emulator support does not establish physical-device support. Confirm the execution environment and payment handoff requirements separately.
One last thing
A checkout test should fail when the wrong order succeeds. In the test environment, deliberately change an expected fixture item or delivery assertion and confirm the flow fails at that checkpoint. This checks the assertion itself rather than merely proving that the purchase path can run.